Показаны сообщения с ярлыком украшениe. Показать все сообщения

2020/10/12

Mixed media rings tutorial for Lindy´s / МК по миксмедийным кольцам

Hi, beautiful gang!

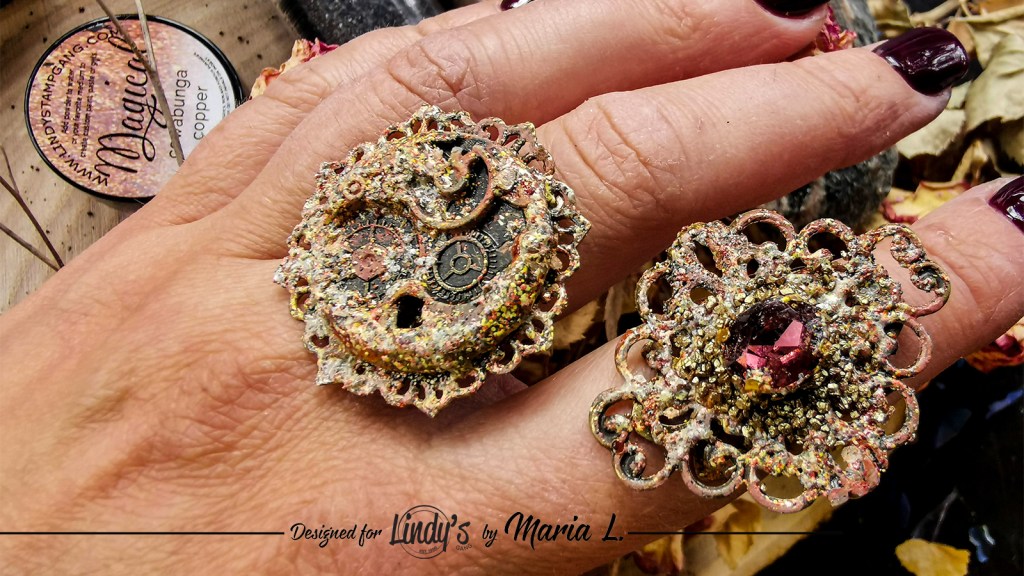
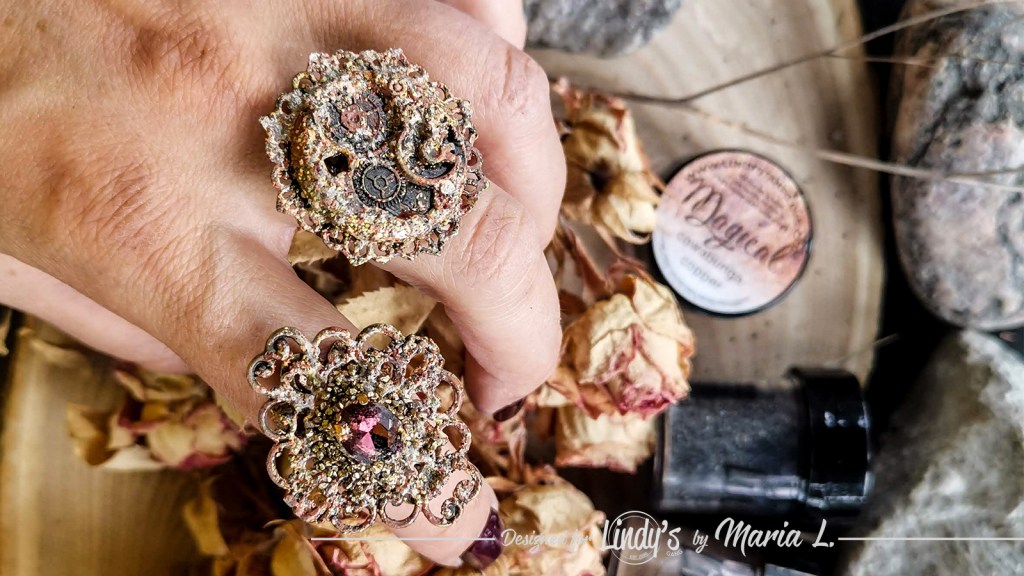
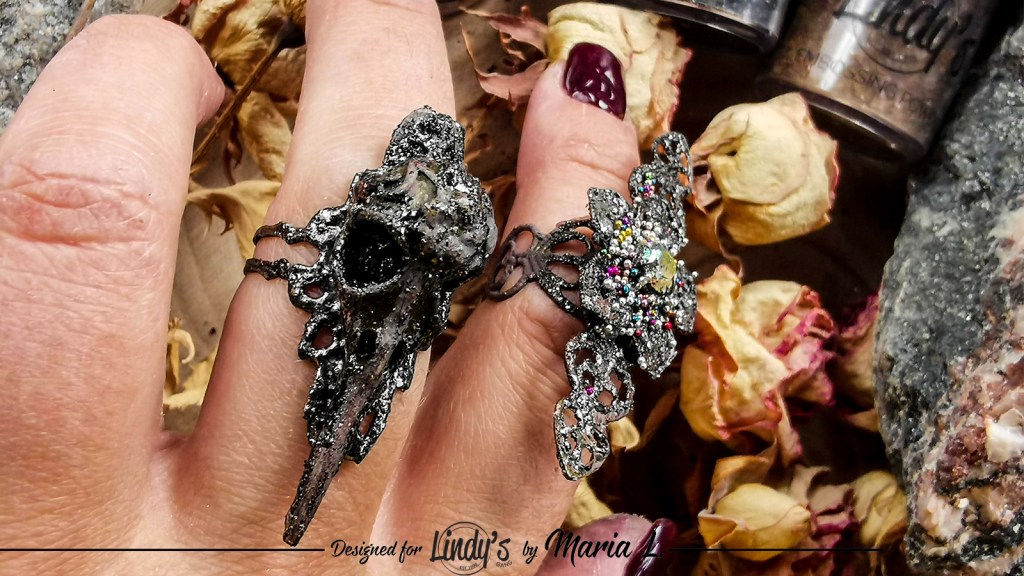
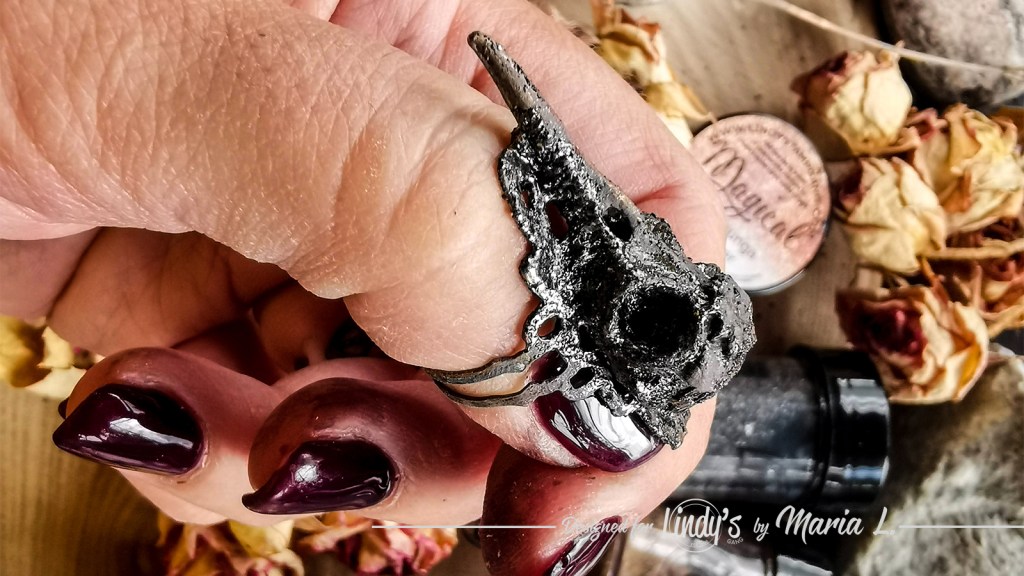
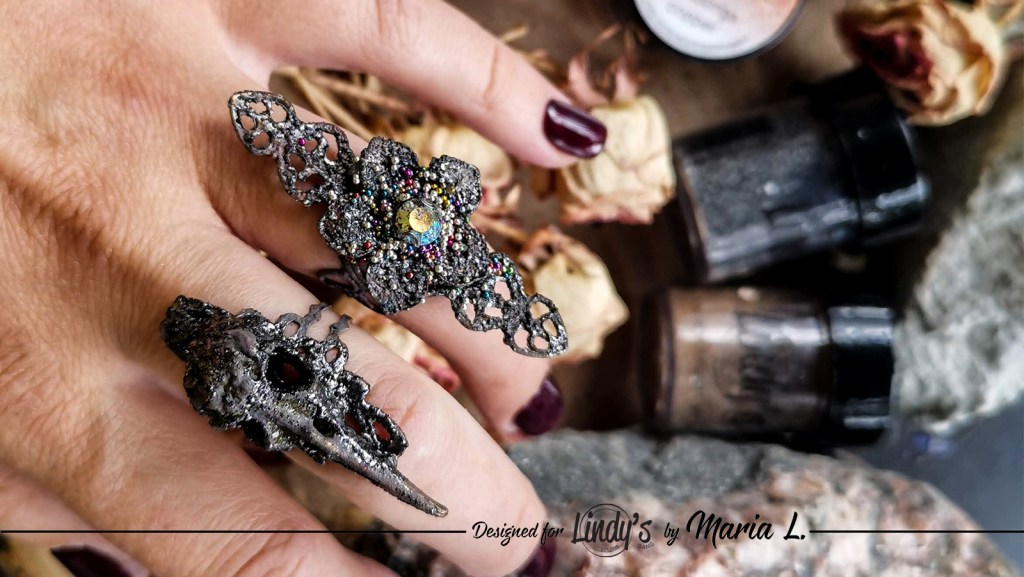
Today I decided to dive into the jewelry world and create several unique rings. I will show you a simple way to make your own striking rings! You will need minimum mixed media materials, but the essentials are our Lindy´s Magicals and the fantastic chunky Metal Maniacs embossing powders.
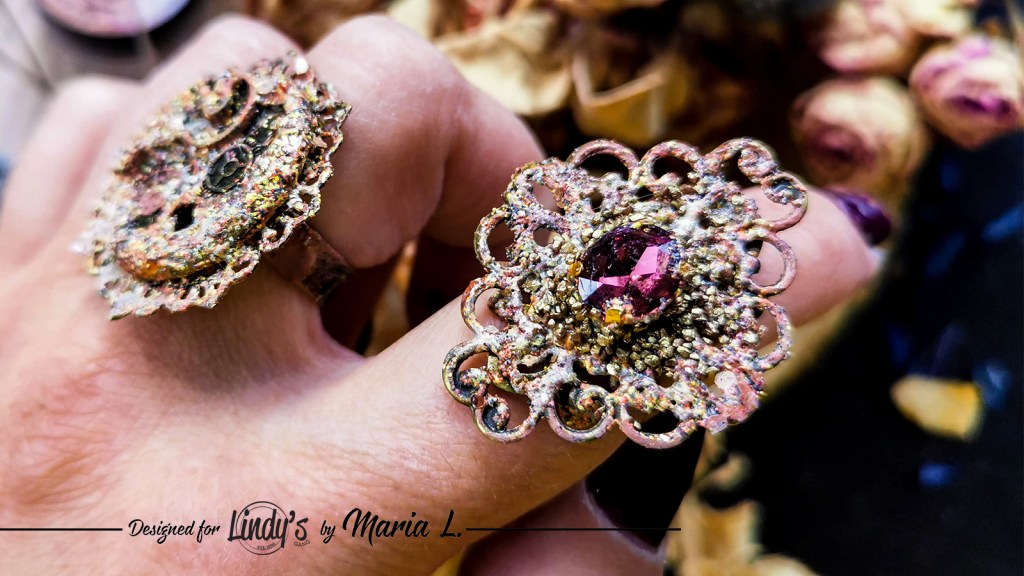
Mixed media rings DIY jewelry tutorial by Maria Lillepruun

Enjoy the video!

BASIC PROCESS

  1. First of all, I attached some chosen zinc alloy embellishments (pendants) to the ring blanks. The best way to do it is using a really sticky but flexible in use Heavy Body Gel (or any other gel adhesive).
  2. When the gel is set, I mixed together some white gesso and our wonderful Magicals (first Cowabunga Copper, then added some Midnight Rendezvous to it - all from the Totally 80's Shimmer Magicals set). This way I created my own acrylic paints with metallic shimmer. I painted the rings with these paints.
  3. Then, I added some rhinestones to the center of two rings with the same Heavy Body Gel.
  4. When all the surfaces were dry, I took out my beloved chunky EPs. I chose Tin Roof, Rusted! and Chip Off the Old Black from the Metal Maniacs set. I applied the dry powder to the rings here and there, especially around the rhinestones, attaching the powders to the Soft Gloss Gel. But any acrylic medium, gel or mixed media glue will work here. The heated EPs melt and turn into liquid metal :) This looks so awesome on the metallic surfaces. Randomly hot melt chunky EP turned my cheap zinc alloy rings into rather old and rusty, but exquisite jewelry.
  5. I also applied some toppings (microbeads, metal dust) to a couple of rings, gluing them onto the Soft Gloss Gel. This added some extra emphasis to the center of the rings. Toppings can be a great addition, but it is definitely not essential, because the chunky EPs are just so beautiful on their own.

Let´s take another look at my new rings.
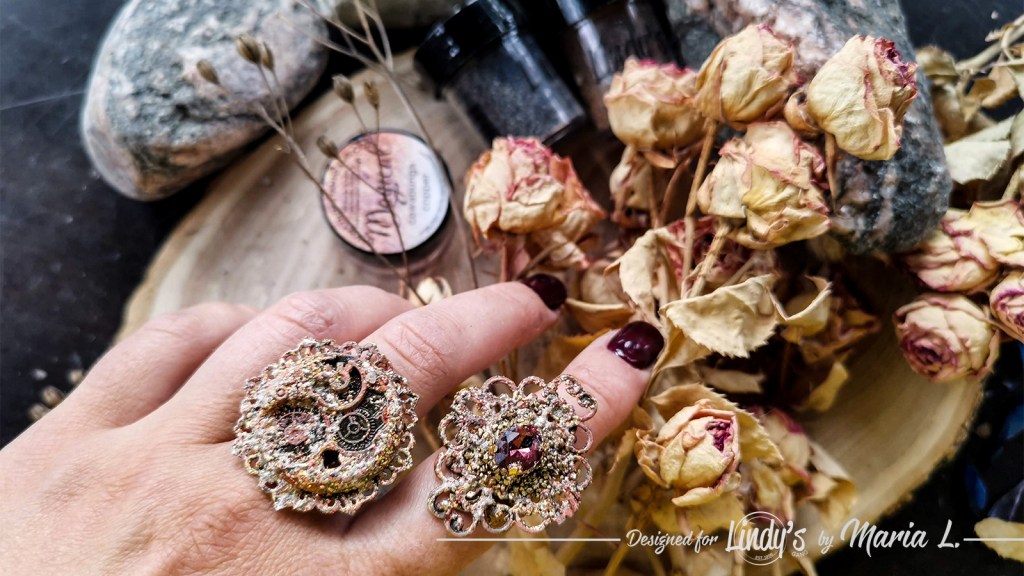
Mixed media rings DIY jewelry tutorial by Maria Lillepruun

Mixed media rings DIY jewelry tutorial by Maria Lillepruun

Mixed media rings DIY jewelry tutorial by Maria Lillepruun

Mixed media rings DIY jewelry tutorial by Maria Lillepruun

Mixed media rings DIY jewelry tutorial by Maria Lillepruun

Mixed media rings DIY jewelry tutorial by Maria Lillepruun

Lindy’s Products

Other Products:

  • Heavy Body Gel, Heavy Gesso White, Soft Gloss Gel (Finnabair / Prima Marketing Inc), ring blanks, metallic embellishments, rhinestones, microbeads, other toppings.

Thank you for your attention!

Maria

2019/12/22

Украшения к Рождеству / X-mas decorations

Привет!
В блоге Mixed Media Place вышло новое задание - нежная зимняя доска вдохновения! У меня по ней сложились украшения к Рождеству, и другие девочки-дизайнеры сделали много красивых работ! Смотрите  здесь!

ENG Mixed Media Place December mood board is charmingly tender. I decided to follow the colors exactly, and created a set of hanging Christmas decorations. 7 Dots Studio "Verano Azul" papers matched perfectly our colors, so I used them as backgrounds for mixed media elements. The set is made on the ready-cut bases by Scrapiniec. I also used a lot of Scrapiniec Christmas chipboard, as well as metallic snowflakes and handmade flowers as decorations. Wonderful Opal Magic Mermaid paints completed the full image of my Christmas hangers.


2019/09/10

Настенное панно Пчела - МК / Mixed media wall decoration The BEE tutorial

Привет! 
В блоге Lindy´s Gang мой новый пост с МК по изготовлению настенного панно "Пчела". Приглашаю к просмотру, мои пчёлочки :)) ! 

ENG Hello, dear friends! Today I am here to present my new project for Lindy´s Gang! This time I shot a tutorial on how I made a mixed media canvas "The Bee". Technically, it is not really a canvas though, but a 3D object, a grungy wall decoration. I used Lindy´s Gang shakers and squirts to create this piece.


Enjoy the video:


Basic Process

  1. I assembled all the details of my project together. I used chipboard, chicken wire, metallic embellishments, a piece of a tree root, and a plastic bee figure which used to be a thermometer.
  2. After the composition was all set, I glued all the pieces together using heavy body gel and PVA glue. Later on, I painted the whole thing black with heavy gesso. When the background was dry, I added some extra texture with a Golden Nugget texture paste and some glass toppings.
  3. I used Lindy´s Gang shakers Antique Gold, Glittering Gold, Antique Bronze to apply the base shades of color to the surface. Then, I painted the chipboards and the bee with our wonderfully covering squirts Maple Syrup Bronze, Polite People Purple.
  4. I also added some golden doodling with a permanent pen here and there on the project, as well as added some rhinestones as decorations.
  5. Final touch: I added some golden flake topping for some additional metallic bling.

Some close-ups

2018/12/08

ScrapsNPieces December challenge / Украшение для дома

Всем привет! 
В блоге ScrapsNPieces вышло новое задание месяца. На этот раз ничего сложного, мы принимаем любой рождественский декор для стола!


Hello dear friends!
December is here, and we’re all so excited about Christmas preparations. Thousands of tiny lights in the streets, the shop windows, and our homes, bring warmth and joy to our hearts. It’s Christmas and we’re all kids again!
There´s a new challenge on ScrapsNPieces blog! It is dedicated to holidays table decorations. The reason being, that these days our dining tables become a very special place where all families and friends gather up to share love and good food!


This year I made a rustic but also glamorous centerpiece. I used natural elements and accented them with mixed media materials! It is beautiful and budget friendly piece of decor! 


My Christmas centerpiece is meant for the dining table. The base is a star-shaped wreath, on which I glued many pine cones with hot glue. I used a silver spray to color it. Then I highlighted the edges of the cones with white gesso. In the middle of the star, I added a wooden décor piece by Wycinanka, which I also painted silver. I also added some flowers and rhinestones on top of it and filled any empty space with dried petals and nuts, which I colored with white paint.


2018/11/07

ГРИБНАЯ ИСТОРИЯ | MUSHROOM HOP

Привет, мои любимые! 
Ух, какую же движуху мы замутили с девочками в Инстаграме и на Ютюбе! Самый умопомрачительный проект осени – Mushroom Hop! Талантливые девочки Настя Корвякова @nastyalena, Лена Мартынова @elena_marty, Оля Равенская @olga.ravenskaya, Света Липницкая @lipnitskaya_s и Юля Тирская @yulia_tirskaya подготовили просто бомбические мастер-классы по созданию самых разных работ с объемными грибочками! Ах да, и я тоже, конечно :)) @magic_attic_maria


ENG Greetings, my favorite people!

Wow, what a stir we hooked up with the girls on Instagram and YouTube!!! The most mind-blowing project of this autumn - the Mushroom Hop! My favorite girls Nastya Korvyakova @nastyalena, Olga Ravenskaya @olga.ravenskaya, Svetlana Lipnitskaya @lipnitskaya_s, Elena Martynova @elena_marty and Julia Tyrskaya @yulia_tirskaya prepared fantastic step-by-step tutorials on creating all kinds of 3D mushrooms! Oh yes, me too, of course :)) @magic_attic_maria


Мало того, мы связались со спонсорами и теперь у нас 6 потрясающих призов для тех, кто будет участвовать в нашем проекте!

🍄 Lindy’s Gang @lindysgang – Сертификат на 50$
🍄 7Dots Studio @7dotsstudio – Сертификат на 30$
🍄 Woodouts @woodouts – Приз стоимостью 30$ + бесплатная доставка
🍄 Сеть магазинов “Творческие люди» - Сертификат на 1000 руб.
@tvorcheskie_spb @tvorcheskie_ast @tvorcheskie_rnd
@tvorcheskie_iv @tvorcheskie_sur
🍄 MiAScrap chipboard @miascrapomsk – Сертификат на 1000 руб. + бесплатная доставка
🍄 The TEA Garden flowers @the_tea_garden – 2 набора цветов ручной работы на выбор + бесплатная доставка

Но и это еще не все!!! Мы с девочками тоже приготовили подарки-сюрпризы!!!
Море вдохновения и грибное нашествие от участников проекта ищите по хэштегу #mushroom_hop


ENG Let me introduce you our gorgeous Sponsors and their amazing Prizes! 

🍄 Lindy’s Gang @lindysgang - $50 certificate
🍄 7Dots Studio - $30 certificate
🍄 Woodouts @woodouts - $30 value prize + free shipping
🍄 The net of scrap shops "Tvorcheskiye" - 1000 rub Certificate @tvorcheskie_spb @tvorcheskie_ast
🍄 MiAScrap chipboard @miascrapomsk – 1000 rub Certificate + free shipping
🍄 The TEA Garden flowers @the_tea_garden – 2 sets of handmade flowers + free shipping


 🍄 6 fabulous secret prizes from Hop Designers for 6 lucky randomly picked participants!


These are links to the 6 channels of our Hop Designers:

• Anastasia Korvyakova 

• Elena Martynova

• Maria Lillepruun 

• Svetlana Lipnitskaya 

• Yulia Tirskaya 

• Olga Ravenskaya


Внимание! Правила участия!

🍄Создать любую работу с ОБЪЕМНЫМИ грибами и опубликовать ее в Instagram до 25 ноября включительно с хэштегом  #mushroom_hop 
🍄Отметить в своем посте всех Спонсоров и Дизайнеров проекта 
🍄    Быть подписчиком Спонсоров и Дизайнеров проекта в Instagram и YouTube
🍄    Не пропустить Грибной видео МК от каждого дизайнера проекта и оставить комментарий на канале дизайнера в YouTube
🍄Среди всех Участников, выполнивших все условия, будут разыграны 6 призов-сюрпризов от Дизайнеров проекта
🍄По итогам проекта будет выбрано 6 Победителей, среди которых будут разыграны призы от Спонсоров проекта
✔    5 победителей – членами жюри
✔    1 победитель – народным голосованием
⚠️ Все Победители и Выигравшие участники будут объявлены 30 ноября!!!


            ENG Rules of the craziest Mushroom Hop


🍄 Create any project you like with 3D Mushroom and upload it to Instagram up to 25, November, using the hashtag #mushroom_hop

🍄 Tag all the gorgeous Sponsors and Designers of the Hop 

🍄 Follow and subscribe all the Sponsors and Designers in Instagram and YouTube 

🍄 Don’t miss the coolest Mushroom Video Step-by-Steps from every Designer of the Hop and leave your kind comment! 🍄 6 Lucky participants will be randomly drawn to win wonderful secret prizes from Hop Designers

🍄 There will be 6 Mushroom Winners of the Hop!

✔ 5 Winners will be picked by Hop Designers voting

✔ 1 Winner will be picked by open public voting
Every Mushroom Winner will get the prize from one of our amazing Sponsors!
⚠️ All the Winners and Lucky participants will be announced on the 30th of November!


А вот и мое лесное чудо. Я сделала настенное загадочное настенное украшение, а грибочки будут у меня из самозатвердевающей глины. На видео я засняла не только изготовление грибов, что было само по себе очень просто, но и создание всей работы с начала до конца. Невероятно сложно оказалось снимать на видео процесс работы с таким темным объектом - цвета съедаются прямо-таки ужасно, все как-то блекленко выходит. Уж сколько я страдала, но хотя бы на фото можно передать всю красоту полутонов. Приглашаю вас к просмотру!

ENG Here it is, my dark magical wall decoration. My mushrooms are made of air-hardening clay, which was pretty easy actually. But I did not film only the mushroom making, I also recorded the process of creating the whole project. It was extremely hard to film such a dark project, but luckily at least the pictures do good to all the semi-shades here. Enjoy!


I used the following products by Lindy´s Gang to create this art piece: 


2018/05/24

Красочный взрыв в ящичке :)

Всем привет, друзья! 

Сегодня я хочу показать вам милую штучку, которая теперь радует меня ежедневно своим красочным решением, ажурностью и драгоценным блеском. Вот все как я люблю :) Moe маленькое персональное лето в деревянном ящичке.


Сделала я этот декоративный шедоу-бокс для греческого блога Scraps N Pieces, где как раз вышло новое задание с суперской взрывной доской вдохновения!


ENG   This time I was really inspired by the colorful roses! I decided to make a decorative object which is kind of a shadow box. I used the wooden Jillibean Soup 6"x6" wood plank crate as a base for it. I filled the crate with all sorts of paper and textile roses of different colors. The top roses in the middle are handmade of paper. They were originally just white, but I colored them with Lindy´s Magicals. I also decorated the crate with Prima colored chipboard and other chipboard branches embossed with beautiful Ranger Verdigris embossing powder. The chipboard fence is textured with Prima sand texture paste and colored with rust effect pastes. The crate itself I also touched up with the rust effect pastes and colored black with Prima black heavy gesso from inside before adding the flowers, so it created additional volume and dimension. Among the decorations, you can also see metallic embellishments touched up with Prima Opal magic rose-gold paint, bead branches, and sisal. I also sprinkled the project with Prima gold rush glass glitter here and there for extra bling and added a suitable text sticker to the base in the end.


2018/04/30

Старый Таллин и винтажное зеркало

Привет!
Задание с очень красивой доской вдохновения вышло в блоге BUSINOKNET! Люблю винтаж в коричнево-лиловых тонах, он нескучен и загадочен :) И по этому заданию я, как ПД, задекорировала самое простое икеевское зеркало. Моя мама - экскурсовод в городе Таллине, и их клубу гидов в этом месяце исполнилось 10 лет. Это зеркало она захотела подарить руководителю клуба на юбилей. Я украсила раму вокруг зеркала изображениями знаковых архитектурных сооружений г. Таллина, добавила покрытый золотым эмбоссингомажурный чипборд, а также узор розовой текстурной пастой и бусинки, вдохновившись соотвествующими картинками с доски. 
Если вы еще никогда не были у нас в Таллине, обязательно приезжайте, хотя бы на одни летние выходные! Именно летом, а также в Рождественские праздники, наш город наиболее красив и приветлив :)


2017/12/23

СП "Магия формы" от ScrapBox - 5 этап... и мой подарок себе на праздники!

Здравствуйте! 
В блоге ТМ ScrapBox опубликован пост с заключительным этапом нашего совместного проекта "Магия формы". Для многих это самая приятная часть - показать итог работы, рассказать о своих впечатлениях от участия! Поэтому давайте не будем откладывать это приятное мероприятие и скорее поделимся своими работами, созданными в рамках проекта. Условие пятого этапа - опубликовать в своём блоге итоговый пост, в котором мы сможем увидеть все четыре работы, выполненные по условиями предыдущих этапов.

А вот и все мои новогодние игрушки-подвески в полном составе! Восемь разноформенных украшений в однож стилистике можно использовать как украшения на елку, на окна, на стены, на люстру, да куда угодно :) Лично я уже повесила их на елку (см. фото ниже).

2017/11/07

Creative Art - Stage 4. Fairy tale canvas

Всем большой-большой привет!


Вот и подошел к концу очень интересный проект "Creative Art" в блоге Mixed Media & Аrt и сегодня я покажу все четыре работы по всем этапам. Проект был поистине замечательный - я открыла для себя несколько чудесных мастериц, супер-креативных девочек! Это здорово :)
Хочу сказать спасибо Оле Кравец и ДК Mixed Media & Аrt за огромное количество вдохновения! Проект получился на высоком уровне, мне особенно приятно, что блогу отлично удалось провести именно международный СП! Спасибо, девочки, за вдохновение!

ENG Thank you dear Mixed Media & Аrt DT for a lot of artistic inspiration! The joint project was truly interesting! I discovered several wonderful artists because of it. Today I will show you all the four project I made during the "Creative Art" joint project.


Stage 1 "Mechanical Explosion" - my art project "Tree of Life"


Stage 2 "Crystal Beauty" - my canvas "Existential crisis"


Stage 3 "The Breath of Nature" - my altered object "Coca Cola in a swamp"
(фото на телефон, уж извините, так получилось)


Stage 4 "Brilliant Decoration" - my canvas "My Fairy Tale"
Мой холст к 4-му этапу СП "Brilliant Decoration", где ОЭ на этот раз у нас бижутерия и блеск. У меня очень много бижутерии и я обожаю использовать ее в скрапе. Тут я оторвалась по полной :))) Сделала декоративный холст 30x30 см с килограммами бус и подвесок, страз и глиттера и назвала его "Моя сказка". Дала волю внутренней сороке-вороне, так сказать. Я получила невероятное наслаждение от рабочего процесса, и теперь такое вот яркое чудо украшает нашу гостиную :))) Надеюсь, вам тоже понравится.


В центре шикарный чипик от ТМ ScrapBox 


2017/08/30

Mотиватор со спиннером и обзор посылки от ТМ Artistic Line


Здравствуйте, дорогие друзья!
Сегодня покажу мой новый летний мотиватор! Началось все с того, что недавно ко мне прилетела очередная ДК-посылочка с набором чипборда от ТМ Artistic Line на мой выбор и самыми последними нашими новинками. Смотрите, что мне прислали!


А вот и чудесная бабочка, которую я вырезала в видеоклипе. На несколько минут ей удалось побыть почти настоящей в цветущем летнем саду :)


Но затем я все-таки применила ее и кое-какие другие новинки в работе. А сделать мне захотелось летний мотиватор для сына! Он любит природу и бабочек, любит зеленый цвет, любит все блестящее... а еще, как многие мальчишки в наши дни, любит спиннеры! :)


Один из них у нас сломался, а это значит, что ему самое место на миксмедийном панно-мотиваторе! Бабочку же я поместила поверх спиннера, чем-то они очень похожи.


2017/08/05

Эльфийская книжечка

Здравствуйте, друзья! Доброе утро!
Сегодня я хочу показать вам мой новый блокнотик. Точнее, наверное, будет сказать, эльфийскую мини-книжечку :) Книжечка, она же подвеска на шею, размером всего 6,5x5 cм и сделана полностью с нуля. Мне хотелось объединить в одной работе легкую готичность и природный мотив, а также использовать побольше серебра. И вот что получилось...


Обложку я сделала из переплетного картона и ткани, которую сначала покрыла черным акриловым медиумом, а затем усложнила поверхность текстурной пастой через трафарет с листиками "Осенний вальс".

2017/04/10

Сказочное вдохновение для Фабрики Декору

Здравствуйте, друзья!
Апрельское задание в блоге ТМ Фабрика Декору на этот раз просто до невозможности яркое и сказочное, а называется оно "The Enchanted World with Josephine Wall"! Просмотрев все работы на сайте английской художницы Жозефины Уолл, я поразилась их красочности, многодетальности и... доброте! Каждая картина - маленький шедевр! Работы Уолл вдохнoвили меня на создание тоже чего-то супер-милого и сказочного...

Итак, на подоконнике в нашей с дочкой спальне сложилась целая инсталляция! Я попыталась передать красочное настроение, многодетальность и еще некоторые конкретные элементы с нескольких картин Жозефины Уолл (а выбрать одну единственную у меня просто не получилось :). Дочка в итоге просто в восторге от нашей собственной маленькой сказки, да и сын тоже :))