Всем привет!
А у меня на канале новый видео-МК по созданию стимпанк холста! Давно я не ударялась в этот любимый стиль, но тут ко мне приехала "коробочка счастья" с чудесным чипом от беларусского бренда "Лавандовый Комод", а там внутри было столько стимпанка!!! В общем, на радостях я пустила в ход сразу много много чипа. Этот бренд оказался для меня открытием - чип толстенький, беленький, чистенкий, дизайны классные! Очень рекомендую! Заказать чип куда угодно можно в группе в ВК, а почитать про Комод побольше в их замечательном Инстаграме.
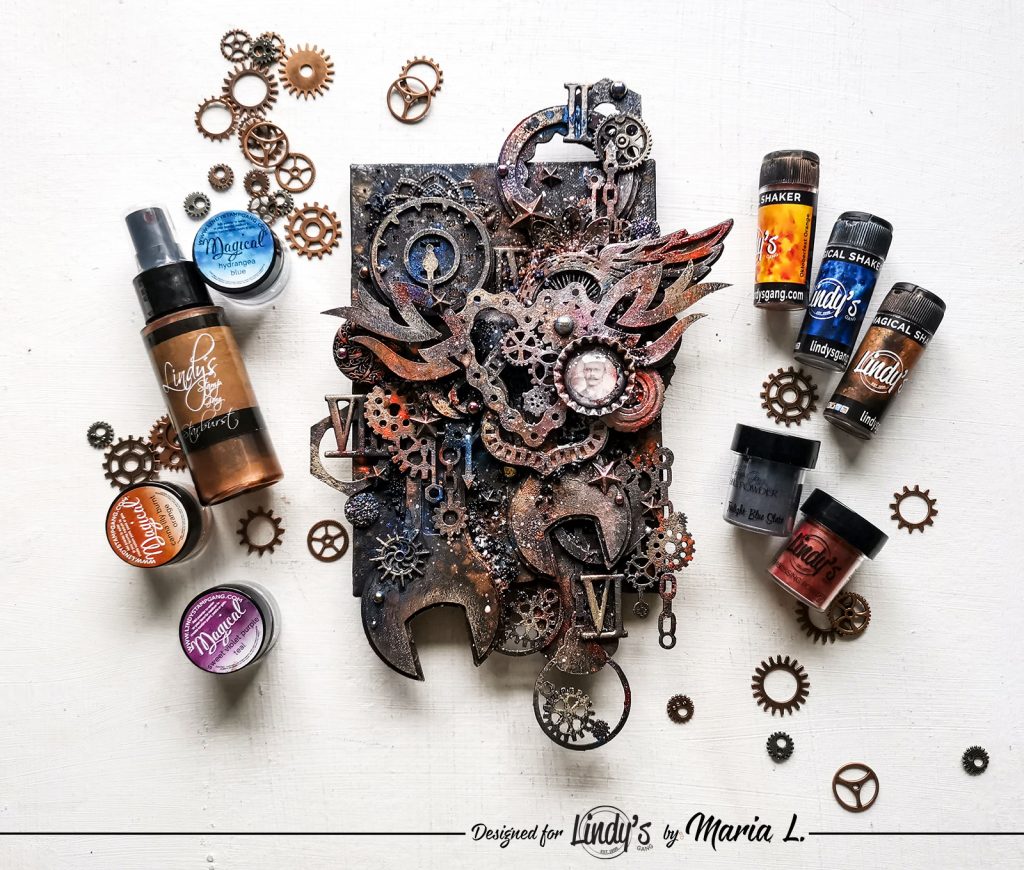
Этот холст - пример того, как очень многодетальную работу можно сделать целиком из чипборда и металлического декора. А раскрасить это все эффектно погут, естественно, товары моего любимого бренда Lindy´s Gang.
ENG Hello, dear Lindy´s Gang friends!
I guess this is my first steampunk project for Lindy´s Gang, although I am a huge fan of the style! I made a relatively small canvas, a new wall decoration for my studio. Luckily, I still have not run out of free space on my walls, but this moment is getting terribly close hahaha...
So here is what I made for your inspiration.
I am in love with Lindy´s Gang sprays and Magicals, but I was not too fond of shakers, because I seemed to have too little control of them while using. But it has all changed now! I have tried them on this project, on black background, and the colorful stains they left were pure magic! So I will definitely let myself free now and will play with my shakers more often!
Basic Process
- First of all, I primed the canvas with black gesso, so it created a perfect background for my project. I also covered the biggest chipboards with the same gesso, doing so on both sides, especially for the chipboards sticking out of the edges of the canvas.
- Then, I arranged my composition on the canvas, combining a lot of chipboard and metallic embellishments in layers. After I was happy with the composition, I glued all to the surface using contact glue and hot melt glue and painted all black with the same gesso.
- When the surface was dry, I prepared three shades of metallic acrylic paint. This is super easy to do by mixing any white metallic paint with Lindy´s Gang Magicals. I used beautiful shades Sweet Violet Purple Teal, Hydrangea Blue, Canna Lily Burnt Orange from the Victorian Bouquet Shimmer Set. When my paint was ready, I painted all the decorations with a semi-dry brush.
- After that, I sprinkled three shades of Shakers chaotically on the surface. My preferred masculine combination was Bratwurst Brown, Oktoberfest Orange, and Bavarian Blue. When I sprayed some water over the powder, the color effect was truly impressive.
- Two different embossing powders (Terra Cotta Rust, Twilight Blue Slate) made the project look more complex. It is good to mix the colors and textures altogether, and EPs give us a great opportunity to add both of them to our creations.
- I added some quartz toppings and microbeads for extra texture, as well as some shiny rhinestones.
- I also used Mission Bells Brown spray to add some depth to the project and sprinkled some white paint over the whole surface as a final touch.
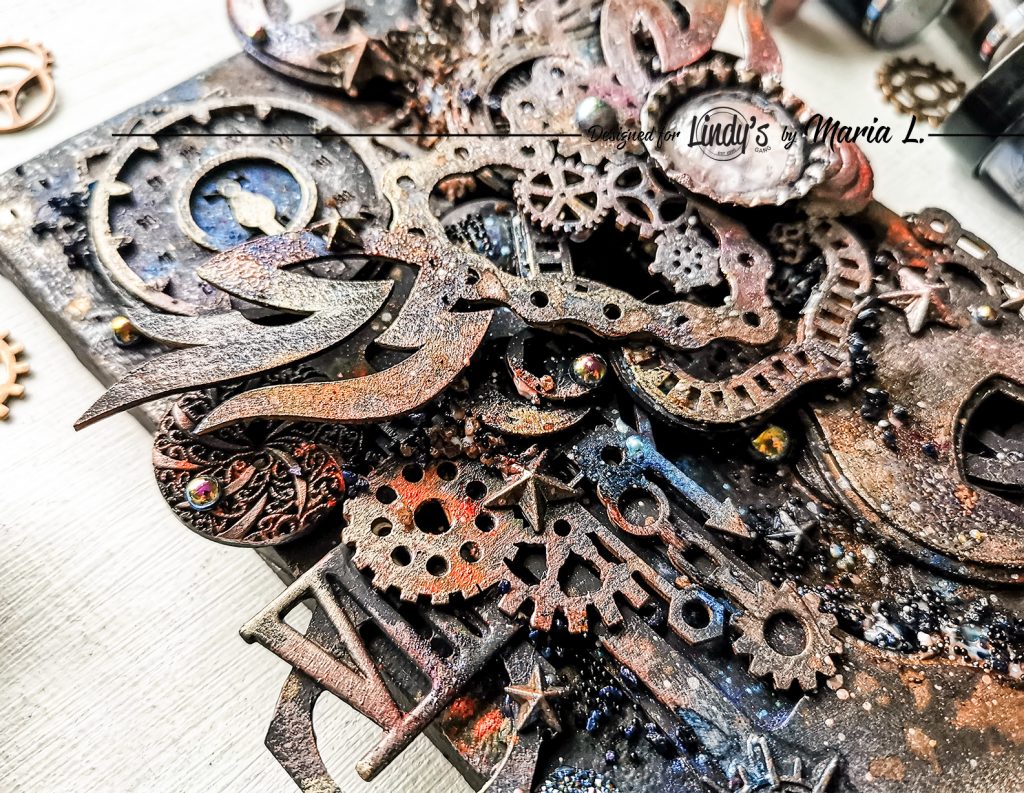
And some close-ups:
The face sticker is from 7 Dots Studio
Lindy’s Products
Starburst Spray: Mission Bells Brown
Magicals: Sweet Violet Purple Teal, Hydrangea Blue, Canna Lily Burnt Orange (Victorian Bouquet Shimmer Set)
Shakers: Bratwurst Brown, Oktoberfest Orange, Bavarian Blue
EPs: Terra Cotta Rust, Twilight Blue Slate
Other Products:
Canvas (unbranded), Heavy Gesso Black, 3D Gloss Gel, metallic wax, metallic embellishments (Prima Marketing Inc), white metallic paint (Maimeri), chipboard (Lavandovyj Komod, Belarus), face sticker (7 Dots Studio), embossing dabber (Ranger), quartz toppings (Fabrika Decoru), rhinestones (unbranded).
Thank you, dear friends!


Этот комментарий был удален администратором блога.
ОтветитьУдалить